Before Dave told us about joiner photography, I had not heard about it before, Dave showed us some example of joiner work and also mentioned David Hockney for one to research and look at in more detail. David Hockney is a well know photographer for this type of photography. With many people using his work as an example of how to do joiner photography, to understand how to do the piece I searched joiner photography for some more example and to see if there was any tips and tricks, while doing this I came across this website called joinerphotography.com which had an article called 10 points on Joiners which used David Hockney’s picture called my mother. He talks about how the brake down of how the picture was taken and some tips on how you could archive it.
When doing research on joiner photography I couldn’t really find any other photographer apart from David Hockney that specifically focused on Joiner photography like he did, so I mainly focused on his work for inspiration.
I really this image as it has multiple textures thought and works really well with the black background, and the the bridge fits perfectly together but had the rolling dark clouds coming behind it and depth and interest to the image. Also David has done a twist on a well known landmark in London, which many people haven’t done before, but still shows the beauty of the bridge.
In the lecture Dave also told us some shortcuts in photoshop and how they work.
Control T – to transform the image by making it bigger and smaller and moving it around freely.
Holding shift – doesn’t let the image go out of shape.
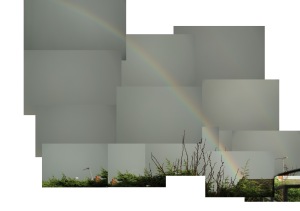
This is my first attempt of doing a joiner photo, I hadn’t planned on doing it on a rainbow but saw the opportunity and took the photos, before taking the photos that would go into the joiner I took an full photo so I have a guide to follow later on, to take the photos for the joiner I zoomed in as much as I could with my lens and took photos of the same area as the full photo going fromeft to right so when I uploaded them again I had a guide. After taking the photos I uploaded them onto my computer before importing them into Photoshop I then got a photo of the full shot to have some to compare the piece to and to also make it easier to know where each piece went before starting and then getting confused.
Unfortunately due to it being unplanned and I wanted to get the shots before the rainbow disappeared I wasn’t able to change the settings of the camera, however I don’t think the setting were far off as I did manage to change the settings after taking a couple back to Manuel as it was on AV however when I did this the images became over exposed and unusable.
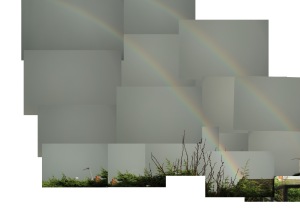
Second Attempt using them same images –
Third attempt –
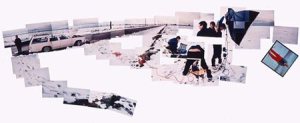
For my third attempt I went to Chester so that it was going to be very different from my first attempt and would have a more interesting focus. I chose to take the image of the bridge as people and cars are consistently going over it so once I add the photos together people may appear in the photo multiple times which has happened in my photo, as well as the man with the backpack to the left he wasn’t in the photo till a couple of pictures but the way I took the photo has now moved him to look like he was there before.

If I was to change anything i would make sure I took the photos in a good order so once I upload them to photoshop I don’t have to go back and two to work out which part of the images goes where and to also make sure I take a wide shot of the image so I have something to follow if I’m not sure what goes where.